Search This Blog

Tuesday, December 28, 2010

Seared Duck Breast with Cherry Port Sauce

Seared Duck Breast 

There's no time like the present to prepare this delicious, elegant entree'. You CAN do this!
Start off with a package of frozen duck breasts. Figure one per person. (If you can get fresh, so much the better).
Thaw them out and place them on a wad of paper towels.  Dry them off, then score the skin in a diamond pattern. You'll want to slice through the thick skin right down to the meat, but not through the meat. Sprinkle some Kosher salt on top. What we're doing here is drawing moisture out of the skin. This will help to crisp up the skin. As you see moisture develop , sop it off with a clean paper towel. Expect to do this about four times prior to cooking.
 Put two tablespoons butter in a cast iron skillet. We use butter here, rather than olive oil, as the milk solids are better for browning. Heat it up on medium / low heat. Since the heat is fairly low, the butter won't burn. Add the duck skin side down. This step will take 15 to 20 minutes to complete. What we're doing here is rendering the fat, leaving a nice, crispy skin all the way through. If you cook this in a skillet that's too hot, you'll end up with a crispy outer skin, and something that tastes like whale blubber underneath. Not delish.
 Don't touch it. Don't move it. Back away from the stove. Just let it be for 15 minutes. Then, you can peek at the skin to see what it looks like. Not 10. Not 12 minutes. 15. Amen.
 When the skin looks like this, it's ready to be flipped over. See how pink it is on the bottom? And how brown and crisp it is on the top?  That's what we want. No overdone duck! It's a crime against fowl, I'm pretty sure. 
 Now, just keep it in the skillet for about 3 minutes on med/low heat. Then, put the breasts on a cutting board, covered with a piece of foil, or a big bowl, or something. Anything. Just cover it up.  Get them out of the hot skillet and rest them for about 15 minutes. 

 Cut these into 1/2 inch slices when ready to serve. Not before. No, No, No. Don't want to lose any precious moisture to the cutting board. That's another crime against fowl. I'm the sheriff of the fowl patrol. I elected myself.
Serve the duck on a bed of creamy polenta, topped with a cherry / wine sauce. Magical. Trust me. Make this. 
Today. 
Thank you.

Cherry Wine Sauce:
1 Tbls butter
1 shallot, minced
1 large clove garlic, minced
1 small bag frozen sweet cherries (about 10 oz)
2 Tbls raspberry (or balsamic) vinegar
1 Tbls brandy or cognac
2 Tbls red wine
1/4 cup tawny port
1/4 cup veal demi glace (may sub beef stock)
2 Tbls butter to finish

Method:
  1. In a skillet, melt butter.
  2. Add shallot and garlic. Cook for about 3 minutes until shallot is translucent.
  3. Add cherries, vinegar brandy, wine,  port, and demi glace.
  4. Reduce until thickened.
  5. Stir in butter to finish sauce.
  6. Taste.
  7. Season to taste with salt and pepper.
Creamy Polenta:
2 1/2 cups whole milk
1 1/4 cups whipping cream
1 1/4 cups chicken stock (or broth). Not water. Water has no flavor. Water is for drinking, not cooking. 
5 cloves garlic, sliced
2 fresh thyme sprigs
1 fresh rosemary sprig
2/3 cup cornmeal (Yep. Plain old cornmeal).
2/3 cup finely grated Parmesan cheese (Not from the green can. Never from the can.)
2 Tbls butter
2 Tbls Creme fraiche

Method:
  1. Mix milk, cream, broth, garlic, thyme, rosemary in a heavy large saucepan. 
  2. Simmer 15 minutes over medium low heat. 
  3. Strain, reserving liquid.
  4. Put the milk mixture back in the skillet. Heat to simmer.
  5. Add cornmeal in a slow stream, whisking constantly.
  6. Mixture will thicken as it cooks.
  7. Do not add more cornmeal. Even though it looks like it's too thin. Just be patient. Creamy polenta takes a little time. And love. And strong arms. Keep whisking!
  8. When the polenta is nice and creamy, take it over the top. Add the Creme Fraiche, Parmesan cheese, and butter. Season with salt and pepper, stir vigorously.
  9. Pour into a serving bowl.
  10. Top with duck slices.
  11. Spoon cherry sauce over the top.
  12. Enjoy.
  13. Ponot Noir is a perfect wine for this dish.
  14. Chocolate Mousse is a wonderful dessert with this dinner.


Friday, December 17, 2010

Dry aged Standing Rib Roast/Prime Rib


Hey, Folks, Last year we made a delicious Standing Rib Roast. This year, we're taking it over the top by dry aging our magnificent hunk of beef. Ever wonder why your prime rib at home doesn't taste as savory, earthy, and utterly delicious as your favorite steakhouse? Um huh... dry aging. There's no big secret here regarding technique. You do not need a giant hook in a meat locker. You do need some clean cotton towels or some cheese cloth, a sheet pan, a rack, and a cold place in the fridge.


Let's go shopping. Rib roasts are plentiful and cheap during the last two weeks of December. Here in Colorado Springs, they are on sale for less than $5.00 / lb. (One grocery here is even throwing in 5 pounds of potatoes free with each rib roast!)
I am expecting 12 guests for dinner, so I got a 6 rib, 13 pound roast, cut from the loin end. (Just ask the butcher at your grocery to cut it for you). Figure 1 rib per 2 adults. I also got two additional roasts, 2 ribs each, also cut from the loin end to stash in the freezer for later. 
As we are dry aging, we need a good cut of meat. "Choice" (most widely available), and "prime" (restaurant quality) are the only options here. You'll pay at least double for "prime" grade, (saw them at Costco),  but with the dry age process, you'll get a delectable prime rib with the "choice" option.
Here goes:
Get yourself a nice rib roast, like this one here.


 You want one that's well marbled in the center.That's what gives it flavor and makes it tender.
 Now, when you get it home, rinse it off really well in a clean sink.

 Dry it thoroughly with some clean kitchen towels.

 Really, thoroughly dry it off. Your roast will not dry age unless it's dry, it will simply get slimy and rotten, and will ruin your holiday cheer. And make you weep. And stink up your fridge. Then you'll end up going out to Chinese on Christmas. (Like in "The Christmas Story". Remember that?)
At this point, get yourself a sheet pan and put a rack in it. This is necessary so any drippings that come out won't taint your roast. Cover the roast up with a thick layer of cheese cloth.
So, I didn't have any cheese cloth, so I used a couple of kitchen towels. It works just fine. Put the roast in the coldest part of your fridge, usually that's on the bottom rack in the very back. I put mine in the fridge in the garage, as it's opened less frequently.
24 hours later, take it out of the fridge. This is what my kitchen towels looked like.
At this point, re-wrap your roast in clean cheese cloth, (or a kitchen towel), and stick it right back in the fridge.
If the cheese cloth becomes moist, change it every 2 days. If it remains dry, leave it alone for another week or so. It can dry age up to 3 or so weeks. I'm aging mine for 14 days. If you haven't picked up your roast until the day before you plan to cook it, no big deal. Using the above directions, dry it overnight.
This is what aged beef looks like. It becomes almost a burgundy color. It should not smell.
Before you prep your meat for cooking, cut off any super dry, leathery looking stuff.
Make the herb paste, using this recipe:
Be sure to factor in the time it takes to bring the roast up to room temp prior to cooking. Get your roast out of the fridge 2 - 4 hours before cooking.
Season it up with Kosher salt and fresh cracked pepper.

Smear your herb, garlic, and olive oil paste all over the roast.
Chop up a couple carrots, celery, and an onion to put in the bottom of the roaster.
 Since I made such a small roast, only 2 bones, I cooked it in a cast iron skillet.
In years past, I've always gone with the 500 degree blast it right off the bat, then turned low. This year, I used a reverse procedure after watching an Alton Brown "Good Eats" episode. He used a flower pot with a bowl kind of thing stuck in it, but that's a little too weird for me.
Since all of my racks are too big for my skillet, I made one with forks.
And, presto! Skillet rack achieved. All we need to do here is elevate the roast off of the bottom of the skillet, so it will not braise in the liquid we put there.
Pre-heat the oven to 250 degrees.  Place your veg in the skillet, and add 1 cup of water.
Stick a meat thermometer smack dab in the center of the roast, making sure to avoid any bones.
 Just before putting the roast in the oven, turn the temp down to 200 degrees (F).
Roast covered, ( I used a second cast iron skillet for cover, as it left an opening for the cord of the thermometer to go through),  until meat thermometer registers 118 degrees.
At 118, take the roast out of the oven and cover with foil. Let it rest until the internal temp comes up to 130 degrees. While it's resting, crank up your oven to 500 degrees.
Place the roast back in the oven, uncovered, for about 10 minutes, until desired crust and color is achieved.
The roast should be perfectly pink (medium rare) throughout.


For the Au Jus, strain the vegetables and drippings from the pan, add 1 cup red wine and 1 cup beef broth to the drippings. Boil until reduced by about 1/2.
Serve on a warm platter garnished with rosemary sprigs.

Merry Christmas!

Ingredients:

  • (1)  5-13 pound rib roast from the loin end of the roast.
  • Kosher salt, about 1 Tbls
  • Fresh ground pepper, about 1 Tbls
  • Paste:
  • (1) Head garlic, cloves separated and peeled.
  • (3) sprigs EACH rosemary and thyme
  • Extra Virgin Olive oil, about 1 cup
  • Veg in roaster, all washed and rough chopped:
  • (2) carrots
  • (2-)3 stalks celery
  • (1) onion
  • Au Jus:
  • 1 cup beef broth
  • 1 cup red wine
  • pan drippings
Process:
Dry age meat as described above.

  1. Remove roast from fridge 3 hours prior to cooking.
  2. Chop onion, celery and carrots. Put them in the roaster.
  3. Place a rack in the roaster for the roast.
  4. Pour 1 cup water over veg.
  5. Place roast on the rack.
  6. In a food processor, buzz up herbs and garlic. Add olive oil in a slow drizzle to make a paste.
  7. Put Kosher salt and fresh ground pepper all over the roast. Rub it in.
  8. Slowly pour garlic herb paste all over roast, using your hands to press it in.
  9. Place a meat thermometer in the center of the roast.
  10. Pre-heat oven to 250 degrees (F).
  11. Roast covered in a 200 degree oven until meat thermometer reads 118 degrees (F).
  12. Remove roast from oven and cover tightly with foil. Rest until internal temp reaches 130 degrees (F).
  13. Turn oven to 500 degrees.
  14. Return roast to 500 degree oven, uncovered, until fully browned.
  15. Remove veg from roaster.
  16. Place roaster over 2 burners on top of the stove.
  17. Heat over medium/high heat.
  18. Add beef broth and red wine.  Reduce by 1/2.
  19. Pour any juices accumulated on the cutting board into the au jus.
  20. Serve sliced roast on a heated platter.


Monday, December 6, 2010

Mediterranean Cous Cous with Seared Sea Scallops


My computer is finally fixed! Hallelujah! And thank you, bonus son H! I'm getting back to the blog after weeks of being out of touch with cyber space. Let's get cooking.

This light, healthy dish is perfect for the weeks between Thanksgiving and Christmas. You know, those days when your pants start getting a bit snug so you're practically living in your sweats? (a.k.a. "happy pants").  It comes together in about 40 minutes and makes for a great main dish, side dish, and leftover lunch. What I like about this dish is the combination of raw and cooked ingredients. It has great texture. This can be eaten hot, cold, or at room temp.
Here's what we need:

4 cups chicken stock
2 cups Mediterranean cous cous
1 bag fresh spinach
1 green (or yellow) zucchini
1 red bell pepper
1 carrot
2 cloves garlic
2 green onions, chopped
6 - 8 sea scallops
1/2 lemon
2 Tbls fresh chopped parsley
Extra virgin olive oil
salt and pepper

First things first. Let's prep the veg. Chop up everything except the carrot. Use a peeler and shave it.

Place the scallops on a paper towel lined plate and sprinkle with Kosher salt. Set aside.


Heat chicken stock to a boil then add the cous cous. Give it a stir.


Simmer for about 7 - 10 minutes until cous cous is tender. Drain and save excess stock.
Put about a Tbls olive oil in a large skillet and heat on medium high heat.
Saute the onions and carrot until the onions are translucent. Sprinkle the onion and carrot with a pinch of Kosher salt.
Stir in the minced garlic and saute for about one minute.


Pour hot cous cous over the spinach. This will wilt it a bit. Then drizzle with about a teaspoon of extra virgin olive oil. Add the chopped red pepper.


Now, put your chopped zucchini into the smoking hot skillet. You're going for brown here, not soft and slimy. Once brown, add it to the cous cous.

Add 1 Tbls butter and 1 Tbls olive oil to the skillet. Get it hot. Pat the scallops dry. Place them in the hot skillet, turning after about 2-3 minutes. Scallops cook in a hurry, so be vigilant. Cook only until golden brown on each side. (6 minutes max).

Place the scallops on top of the cous cous. Squeeze 1/2 a lemon on top.
Sprinkle with chopped parsley.

Taste. Add more stock,  salt and pepper, as needed for moisture and taste. Finish with chopped chives or green onions.
Serve.

The great thing about this dish is it's versatility. Don't have scallops? Add shrimp. Allergic to seafood? Leave it out. Add some toasted pine nuts and some cheese (Feta, Mozzarella, Manchego, Parmesan). Need a side dish? Leave out the seafood. This is wonderful served at room temp, (great make ahead), cold, or hot. Sub any vegetables you have on hand... Cucumbers, tomato, artichokes, etc. Clean out your fridge and make a tasty dish!


Ingredients:

4 cups chicken stock
2 cups Mediterranean cous cous
1 bag fresh spinach (6 oz)
1/2 onion, any color, minced
1 green (or yellow) zucchini, rough chopped
1 red bell pepper, seeded and chopped
1 carrot, shaved
2 cloves garlic, minced
2 green onions, chopped
6 - 8 sea scallops, seared
1/2 lemon
2 Tbls fresh chopped parsley
1 Tbls butter
Extra virgin olive oil
Kosher salt and fresh cracked pepper


Method:


  1. Prep the veg. Chop up everything except the carrot. Use a peeler and shave it.
  2. Place the scallops on a paper towel lined plate and sprinkle with Kosher salt. Set aside.
  3. Heat chicken stock to a boil then add the cous cous. Stir.
  4. Simmer for  7 - 10 minutes until cous cous is tender. Drain and save excess stock.
  5. Put 1 Tbls olive oil in a large skillet and heat on medium high heat.
  6. Saute the onions and carrot until the onions are translucent. Sprinkle the onion and carrot with a pinch of Kosher salt.
  7. Stir in the minced garlic and saute for about one minute.
  8. Pour hot cous cous over the spinach.
  9. Drizzle with one teaspoon  extra virgin olive oil.
  10. Add the chopped red pepper.
  11. Place chopped zucchini into the smoking hot skillet. Brown.
  12. Add 1 Tbls butter and 1 Tbls olive oil to the skillet. Pat the scallops dry. Place them in the hot skillet, turning after about 2-3 minutes. Cook only until golden brown on each side. (6 minutes max).
  13. Place the scallops on top of the cous cous. Squeeze 1/2 a lemon on top.
  14. Sprinkle with chopped parsley.
  15. Taste. 
  16. Add more stock,  salt and pepper, as needed for moisture and taste. 
  17. Finish with chopped chives or green onions.
  18. Serve.


Monday, November 22, 2010

How to Roast a Turkey

How to Roast a Turkey
 How big a turkey should you buy? Well, I never buy a turkey over 15 pounds because I can't lift it into the oven in the roaster without burning my forearms. It's also cumbersome to flip over.  If you need a gigantic turkey to feed a crowd, you might do better to roast (2) 12 pounders, as you'll have 4 drumsticks, 4 thighs, 4 wings, and two giant breasts.
How to defrost a turkey: 
Best method: stick the frozen bird in your fridge for 3 days. Take it out of the fridge, (after thawed), relieve the cavity of the internal organs and neck, rinse it off, and put it in a brine. Trust me. It's worth the extra step. Really. Do it. Brines are super easy, require no measuring, and add a world of flavor and moisture unheard of in the un-brined bird.
Worst Method: Soak in hot tap water in the sink until thawed. Say "hello" to food poisoning, "goodbye" to a lovely day with your family and friends,  and "Hello" to both the porcelain God in your bathroom, and to the E.R. staff.
Alternately, use the "fine" defrost method on your microwave, flipping and turning about every 5 minutes.
Let's brine this bird! 
Get some Kosher salt, about a cup; Brown sugar, about a cup; whole peppercorns, about 1/2 a cup;  a handful of fresh herbs: Thyme sprigs, sage leaves, parsley. Add about 1/2 cup maple syrup. This will make your turkey beautifully brown and crispy.
Put in a saucepan with enough water to cover, and bring to a boil until salt and sugar are dissolved.  Get a giant zip top bag, put the turkey in, and add the brine liquid.


See how it say's "Basted"? That's code for "injected with chemical salt solution".
I

Heat it up on top of the stove just until it simmers. Stir it up, making sure salt and sugar are dissolved. Throw in some ice cubes to cool it down.

   Put the bird, sans neck and guts, in a big Zip top bag. I generally use a 2.5 gallon Ziploc, but I found a super big reusable brining bag at Tuesday Morning, so I used that. Pour the brine into the bag and cover with cold water. Put the bag into a big container. I tried my 7.5 quart dutch oven, but it was too small.


So then, I put it in a cooler. Since I had (made) space in the fridge, I put it in. If you have no space in the fridge, just fill up the cooler with ice or ice packs. Make sure the temp stays below 40 degrees (F). You'll have to replace the ice or packs as needed to keep bacterial growth at bay.

After about 16 hours in the brine, (24 hours for a fresh turkey) take the turkey out of the brine and rinse thoroughly.
After drying the bird thoroughly, put it on a sheet pan lined with a thick layer of paper towels, and stick it right back in the fridge.
"Why" you ask? Because if you let the bird sit uncovered in the fridge for 24 hours, it helps get the skin super crispy. Soggy skin is not delicious.
 Take the turkey out of the fridge at least an hour before you want to put it in the oven. Place the bird breast side down, on a couple of ice packs, or a bag of frozen peas. The breast tends to cook much more quickly than the rest of the turkey. This will help keep the breast from cooking through before the rest of the bird is done.
Turkey on it's own does not have a lot of flavor. You must give it some.
Start by making a compound butter. (Fancy term for softened butter with stuff in it). Start with one stick of softened butter.

Add a good pinch of Kosher salt. Then at least 2 tsps fresh cracked pepper.

Chop up about 4 fresh sage leaves.

Grab a bundle of fresh Thyme.

Strip the leaves off by holding the stem, pulling back down the stem removing the leaves. No need to chop these. Just throw them in the bowl with the butter.
Mince up a clove of garlic. Throw it in.

Take small fork and stir it all together. You want a smooth paste.

Now that the herb butter is done, move on to chopping the veg.
Wash 2-4  big carrots. No need to peel them, we're just using them for flavor.
 
Wash about 6 stalks celery. Don't peel them.
Rough chop them.
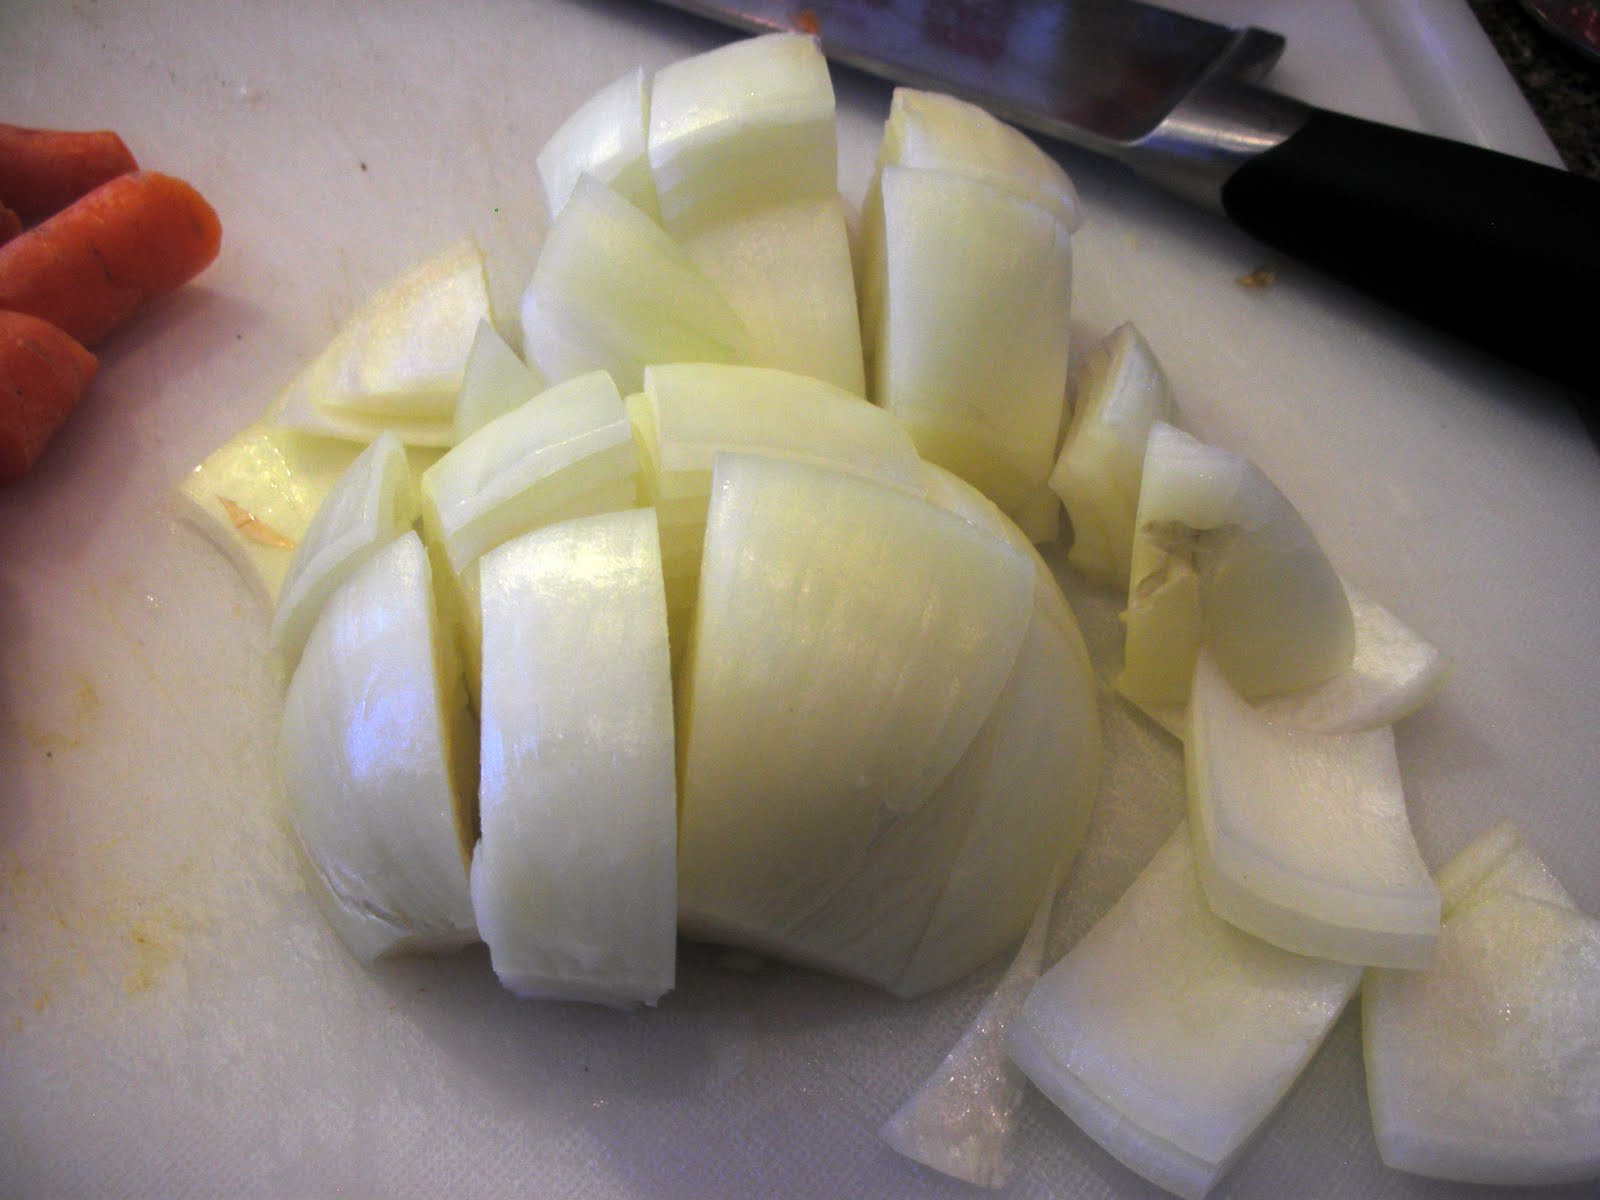
Peel one very large yellow onion.
Rough chop it.
Time to stuff the bird.
Cut a head of garlic in half. Salt and pepper the cavity of the bird.
 Put in 1/2 of the garlic head and as much of the chopped veg as you can stuff in the cavity. You could also add a quartered apple, orange, or lemon. It's up to
you. Stuff some whole sprigs fresh thyme, sage, and rosemary in the cavity.
Can you see the plastic thing stuck in there to keep the legs together? Cut it out. It doesn't work well to keep the veg inside the cavity, and it's annoying, and ugly. Ugly does not belong in a delicious turkey. Stuff the cavity with veg's because they are full of water, which will help keep the bird moist. If you stuff with a bread stuffing, the bread will soak all the moisture right out of your turkey. Cook the dressing on the side with home made turkey stock.
O.K. Let's use that herb butter. Gently lift the skin off of the breast, and work your hand in there to create a pocket. That's a pumpkin cheesecake from Costco in the background. Very delish.
Yep. That's my whole hand in there. The 24 hours to dry in the fridge step is essential, as wet skin will tear. See how I'm able to stretch that skin?
I'm up to my wrists in turkey!
Now, grab a handful of herb butter and massage it into the breast, under the skin.
Once you've gotten a couple handfuls of butter under the skin, butter up the outside.
Bird buttered. Check. Now, lay out the string you'll use to truss the turkey.
 You can try to do a fancy one string truss, or you can do it simply with 3 pieces of kitchen string or twine. Take one very long piece of string and tie it lengthwise around the bird. In the photo above, do you see that tail like hunk of flesh between the legs? You want to secure that up so your stuffed veg doesn't fall out.

Then tie a string around the wings to keep them close to the body, and tie the tips of the legs together. Some people are able to use the slit cut in the flap type thing to secure the legs, but I just can't see to get them to stay without ripping the skin. Must just be a klutz issue.
Salt and pepper the outside of the turkey. Sprinkle on some fresh or dried herbs.

Preheat the oven to 425 degrees. Place oven rack in the lowest position. You'll probably have to remove one of the racks so the turkey and roaster will fit in the oven.

Since I don't have a V Rack,  I made one with 2 cooling racks. Kinda ghetto, but it works. Keeps the turkey from rolling all over the place.

Cover each rack with foil, then take a paring knife and slice about 25 or so holes in each foil lined rack . This will ensure crispy skin all around, and keep the bird from sticking to ghetto rack.

Place the rest of the chopped veg in the bottom of the roaster and cover with water. This will be the base for the gravy. I made the mistake of using chicken broth instead of water, and my gravy turned out way too salty.
Place the turkey rack in the roaster, if it's not there already.

Roasting method:
  1. Put the turkey breast side down in a 425 degree (F) oven for 45 minutes. If the turkey is over 18 pounds, leave it in for an hour.
  2. After an hour, take the turkey out of the oven, close the oven door. Turn heat down to 325 degrees (F). The backside of the turkey should be beautifully brown.

  3. Brush it all over with melted butter.


  4. Now, it's time to flip the turkey over so it will continue to roast breast side up for the remainder of the cooking time. Take a couple of big wads of paper towels or 2 clean potholders, and pick up the bird (head and tail sides), and turn it over, breast side up.


  5. Brush with melted butter.

  6. Insert a meat thermometer into the thickest part of  the thigh or the breast, making sure the probe isn't touching the bone. If you have of those pop up timers embedded in the turkey, take it out and throw it away. It's a useless piece of garbage that will cause your turkey to overcook. Not delicious. 

  • Put the turkey back into the oven. Keep the door closed.
  • When the meat thermometer registers 160 degrees (F), take it out of the oven. (On average, figure about 20 minutes per pound in the oven. However, this time table can vary greatly due to differences in oven temp, type of roaster used, temp of the bird when you put it in the oven, etc. That's why a meat thermometer is essential. You can't guess on this).
  • Take the turkey out of the roaster (160 degrees), put it on a cutting board or in an oblong baking dish, and cover it tightly with foil.
  • Rest for 15-20 minutes.


While the turkey is resting, make the gravy.
This is one beauty of a turkey. But the real question is, "how does it taste?"  My first taste tester, me, found this turkey to be extra moist and flavorful ,with exceedingly crispy, flavorful skin.
This post is really long due to all the steps involved in prepping this bird. However, each of the steps don't take long at all.  Please post questions and comments.
Charyl


Labels

Appetizer (9) arugula (1) asian (2) Asparagus; Vegetarian (1) avocado (1) bacon (1) Bargains (6) Bargains /Great websites (1) beans Mexican (1) Beef (2) beurre blanc (1) bread (2) butter lettuce (1) chicken (2) Chili (1) chowder (1) citrus salad (1) clementine (1) Cous cous; Main dish salad (1) dessert (1) dinner (2) dip (1) Dry aged Prime Rib Roast (1) easy meal (1) fish (2) french onion (1) Fruit (1) gravy (2) green beans (2) grilled (2) Herbs (1) holiday (5) Holiday Main:Beef (3) holiday side dish (1) Italian (1) kid friendly (1) leftover turkey (1) leftovers (1) light (1) Lobster (1) low carb (1) Low fat (1) Main course duck (1) Main dish beef (1) Main dish casseroles (6) Main dish chicken; Crock pot chicken; One pot meal (1) Main dish chicken;weeknight dinner (1) Main dish Lamb (1) Main dish Pork (1) main dish poultry (3) Main dish salad (6) Main dish seafood (4) Main Dish Soups (9) main dish: beef (4) Main Dish: Chicken (1) Main Dish: Ground Meat (1) Menu's (1) Mexican (1) on the road again (2) oyster (1) Pasta (3) pesto (1) Pie (1) potato (1) poultry (1) Prime Rib Roast (1) raw (1) roasted (1) Roasted garlic (1) Roasted garlic pesto (1) Salad (4) Salmon (1) Sandwich (1) scallops (1) sea bass (1) seafood soup (2) Side dish (2) Side dish: potatoes (2) Side dish: rice (2) side salad (4) slow cooker (1) smoked salmon (1) snack (1) Soup (5) stew (2) stock (2) Summer salad (3) Turkey (3) vacation (1) Veal; Main dish Veal; Holiday veal; Grilled meat (1) Vegetables (4) vegetarian (9)

Pages

Followers

About Me

Colorado Springs, Colorado, United States
I'm a home cook that can put some good tasting food on the table, most of the time. My family knows dinner is ready when the fire alarm goes off.